Illinois Standards include the following:
Know the reason for rules-what are the rules in your house? What are the rules in your community? Why do we have these rules? Make up a list of school rules.
Participate in voting-vote for what movie you will watch on Fun Friday, vote for your favorite color (or flavor ice cream, or subject, etc) You can then turn this into a bar graph and get your math in.
Develop an awareness of leaders in your community- what makes someone a good leader? how do community leaders obtain their jobs? what types of things do leaders do? Have pictures of the president, mayor, and governor.
Identify community workers and the services they provide-police officers, firefighters, garbage men/women, etc. Print pictures off the internet for the students to identify.
Begin to understand the use of trade to obtain goods and services-read a book about Native Americans and their use of trade. Ask your students what they would trade with you so they could have something of yours. Let the students bring in objects from home to trade with others (make sure they get their item back at the end of the day).
Recall information about the immediate past-what day was yesterday? what did we talk about in math yesterday? what did we eat for lunch yesterday? what book did we read this morning? Start asking these questions to get them thinking about the past.
Locate, describe and explain places, regions and features on the Earth-have pictures of different landforms for students to identify. Explain what they are made up of.
Recognize similarities and differences in people-have pictures of people in families-do they look the same? what about them is different? Compare two pictures of two different families-what do these people have in common? What is different? Why don't we all look alike?
Understand that each of us belongs to a family and recognize that families vary-sit with each student and ask "Who is in your family? Can you draw a picture of your family?" Hang these pictures in your classroom.
Showing posts with label preschool. Show all posts
Showing posts with label preschool. Show all posts
Monday, July 18, 2011
Science and the Young Learner II
Websites to find experiments:
http://www.easy-kids-science-experiments.com/kindergarten-science-experiments.html
http://www.buzzle.com/articles/kindergarten-science-experiments.html
http://www.education.com/activity/kindergarten/science/
http://www.parentingscience.com/kindergarten-science-activities-tracking-animals.html
http://www.kindergarten-lessons.com/preschool_science.html
http://www.first-school.ws/theme/science.htm
http://www.atozteacherstuff.com/Lesson_Plans/Science/__Preschool/index.shtml
http://thesnailstrail.blogspot.com/2009/02/no-child-left-inside.html
http://www.wbrschools.net/curriculum2/science/sk/01%20SCI_Kindergarten.pdf
Do you have any that aren't listed here? Please leave a comment and let us know about it!
Wednesday, July 13, 2011
Science and the young learner
Your young learner should be given opportunities to explore their senses. In the past I have collected film canisters and added cotton balls to them. I then use oils, extracts, or perfumes to scent the cotton balls. I allow the child to smell what is inside and guess what it is. Then we record what we think and check later. You can also gather foods that cover all the taste senses and have them tell you which taste it falls under. My favorite was sour! It helps to have pictures of each taste so the kids can understand the word if they don't already (some kids may not understand bitter but understand that medicine can be bitter).
Let your young learner touch and explore. Many people are worried about the mess it will make, but it’s important to allow them to touch and feel things. Finger paint, squirt shaving cream all over your table, make gel bags for them to squeeze, make dough, make goo (http://littleshop.physics.colostate.edu/Try%20At%20Home/goorecipeone.htm). The messier the better. Use vivid words when you are discussing what it feels like.
Start having your young learner collect things from nature and describe them to you (the pinecone is brown, this rock is heavier than this rock, this stick looks like a Y). You can have them draw a picture and write about it. You should translate what they wrote under what they wrote.
Throw different tools in the sensory table. Have items to view with a magnifying glass. Have them draw a picture of what it looked like without the magnifying glass and another of it with the magnifying glass. Ask why people need to use magnifying glasses. Let them read a book using one. Let them stick thermometers in snow or water and record what they see. Ask why it went down when stuck in snow, but up when it was placed in boiling water (you obviously need to put it in the boiling water-but they can still look to see that the temp went up). Ask about other things that would cause the temp to go up or down.
By this age, your young learner should know if something is living or nonliving. Go outside and have them find things that are nonliving. Ask them why it’s nonliving. Do the same for living things. Gather pictures of living things and ask them to group them. What do these living things have in common? What is different? Once they know the difference between living and nonliving start to discuss the needs of living things. What is a need? What is a want? What happens if we don’t have something we need? What if we don’t have something we want? Gather pictures of needs and wants. Have your young learner put them in two piles by wants and needs. Make sure you discuss each item and why it’s a need or want.
One of the most favorite activities was using magnets. Place metal items on a table and place a magnet under. Show how the objects move. Show how you can pick metal items up with it. Show what happens if you try to pick up plastic or paper items. Why doesn’t it work? Hide metal items in sand and let them find it with the magnet.
Next, work on gravity. Stand on something stable and drop items. What happens if you drop a book and toy car at the same time? Have them feel each item and guess which will hit the floor first. Make a prediction and record it. Talk about the fact that scientists always make a guess as to what will happen first. After they guess, try it out. Were they right? Have them record what really happened.
Weather is a big part of preschool. After I did calendar I would always do weather. Keep a chart with pictures of the different kinds of weather. You can do it by the month or by the week. Compare today’s weather to yesterdays. Have a spot available to guess what tomorrow will be like. Talk about what you should wear in that kind of weather. You can show pictures of weather and have them draw people wearing the appropriate clothing.
This is just the beginning of science and your young learner. The world is your classroom. Go outside and use it!
Saturday, July 9, 2011
Preschool Math
3 to 4 year olds are just starting to be introduced to this subject. You want to make sure you are keeping it simple and using it in everyday life. I can't tell you how many 3rd graders I teach do NOT know why they need to learn certain things I'm teaching in math. I always make sure when teaching a math lesson that I connect it to everyday life. More on math in third grade will come later.
For now, here are some concepts to work on with your 3 and 4 year old.
First, here are the Illinois Standards for early learners. I hesistate to post this link because Illinois will soon be switching over to National Standards. But in the meantime, this will help you to plan your lessons.
http://www.isbe.state.il.us/earlychi/pdf/early_learning_standards.pdf
Your 3 and 4 year old should understand what you mean when you ask them "How many _______ do you see?". They should have the ability to count the number of objects in a set. I'm not a huge fan of worksheets at this age. You can have them count items around the classroom or out on the playground. Make sure you ask them in different ways (How many rocks do I have? and Can you please give me three rocks?) You also want to start matching sets to the numerical number and the number in words. Something like this...
http://donnayoung.org/math/number-match-1.htm
You don't have to have a worksheet to do this. Have objects on the table and give your student notecards with the numbers written on them. Have them set down the notecards next to the right group.
At 3 you can start asking simple problems like, "I have four cookies here. If I take one more, how many cookies will I have?". Make sure you have the objects in front of you for concrete learning. Some three year olds may solve it without manipulatives, but this isn't very common. Use manipulatives as much as possible with your young learners.
Your 3 or 4 year old should be able to make comparisons. They should be able to look at groups of objects and tell you which group has more or less. Make sure you use words like more, most, less, least, etc. They should also be able to compare lighter, darker; shorter, taller; bigger, smaller; etc. At this age you want to start having them order objects by size (smallest to largest, largest to smallest, etc)
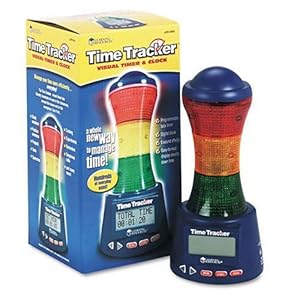
This is a great age to start using a timer when you say how long something is going to be. When you say, "You have five more minutes of free time" make sure you set the timer. "I'm setting the timer for five more minutes. When the timer goes off it's time to clean up". I have this timer for my third graders and they looove it!
3 and 4 year olds should be able to repeat simple patterns. You can do this with beads, blocks, balls, etc. Make sure you are using the SAME object ONLY in a different color. Using different attributes may confuse your little learner.
For now, here are some concepts to work on with your 3 and 4 year old.
First, here are the Illinois Standards for early learners. I hesistate to post this link because Illinois will soon be switching over to National Standards. But in the meantime, this will help you to plan your lessons.
http://www.isbe.state.il.us/earlychi/pdf/early_learning_standards.pdf
Your 3 and 4 year old should understand what you mean when you ask them "How many _______ do you see?". They should have the ability to count the number of objects in a set. I'm not a huge fan of worksheets at this age. You can have them count items around the classroom or out on the playground. Make sure you ask them in different ways (How many rocks do I have? and Can you please give me three rocks?) You also want to start matching sets to the numerical number and the number in words. Something like this...
http://donnayoung.org/math/number-match-1.htm
You don't have to have a worksheet to do this. Have objects on the table and give your student notecards with the numbers written on them. Have them set down the notecards next to the right group.
At 3 you can start asking simple problems like, "I have four cookies here. If I take one more, how many cookies will I have?". Make sure you have the objects in front of you for concrete learning. Some three year olds may solve it without manipulatives, but this isn't very common. Use manipulatives as much as possible with your young learners.
Your 3 or 4 year old should be able to make comparisons. They should be able to look at groups of objects and tell you which group has more or less. Make sure you use words like more, most, less, least, etc. They should also be able to compare lighter, darker; shorter, taller; bigger, smaller; etc. At this age you want to start having them order objects by size (smallest to largest, largest to smallest, etc)
This is a great age to start using a timer when you say how long something is going to be. When you say, "You have five more minutes of free time" make sure you set the timer. "I'm setting the timer for five more minutes. When the timer goes off it's time to clean up". I have this timer for my third graders and they looove it!
3 and 4 year olds should be able to repeat simple patterns. You can do this with beads, blocks, balls, etc. Make sure you are using the SAME object ONLY in a different color. Using different attributes may confuse your little learner.
Friday, July 8, 2011
The Sensory Table
One of my favorite centers is the water table (AKA sensory table). I had one in both my preschool and kindergarten classrooms. This was always the center that EVERYONE wanted to be at.
This is what a good sensory table looks like:
http://amzn.to/pLdlXj
It's standing so children don't have to be stooped over it. There is a cover for when that center is closed for the day, or part of the day, or for whatever reason you are closing it (we had to close it for kids fighting over it). Also, there are two sections, which means more kids can be at it at one time.
Some things I have put in the sensory table:
Really, I could go on and on...Hopefully this is a good starter list for you.
This is what a good sensory table looks like:
http://amzn.to/pLdlXj
It's standing so children don't have to be stooped over it. There is a cover for when that center is closed for the day, or part of the day, or for whatever reason you are closing it (we had to close it for kids fighting over it). Also, there are two sections, which means more kids can be at it at one time.
Some things I have put in the sensory table:
- Soapy water and things to wash (dishes, babies)
- Water with glitter in it
- Water and toys (boats, turkey basters, small nets and plastic fish)
- Baby oil and buckets
- Wood shavings or sawdust
- Felt pieces/ fabric pieces
- Feathers
- Sand with shovels, pails, plastic bugs, seashells, toy trucks
- Snow (make sure they wear their mittens!)
- Dried peas, beans, pasta, popcorn kernals, or any kind of seed (be careful of grass seed-grass can grow anywhere!) with measuring cups, big spoons, pots
- Aquarium gravel
- Cotton balls with large tweezers to pick up them up
- Hay with toy horses
- Sugar or salt with kitchen items or plastic animal toys
- Leaves, acorns, twigs, pinecones
- Plastic eggs and Easter grass
- Shaving cream!
- Birdseed and toy birds
- Packing peanuts (very messy) hide items in there for them to find
- Large beads and string
- Buttons
- Oatmeal (not cooked)
- Pom-poms with ice cream scoops and cups or fake ice cream cones
- Marbles with melon scoops (the scoop you use to make your melon pieces into balls)
- Magnets and metal objects
- Coffee grounds
- Potato flakes
Really, I could go on and on...Hopefully this is a good starter list for you.
Making Choices
In both my preschool and kindergarten classrooms, I had to find a way to keep my centers organized. During free exploration time, I didn't want a ton of students in one center. So, to limit the number of children in each center, I did two different things.
In my preschool classroom there was a large bulletin board. There was a picture of each center, with a label, and pieces of velcro under it. The number of velcro pieces indicated the number of children allowed in that center. Each child had a small piece of tag board and their picture on it. On the back was a piece of velcro. When they wanted to go to a center, they would stick their picture card on the other velcro piece under that center. If there wasn't a velcro piece for them, that meant the center was full and they had to make another choice.
When I taught kindergarten I had a smaller classroom. Instead of a choice board, I had the children make beaded necklaces, each a different color. The necklaces were hung on a 3M hook in each center. The number of necklaces hanging indicated how many children were allowed in that center. If there wasn't a necklace, there was enough room. I kept the colors in each center the same. So pink was for dramatic play, green for science, white for the water table, etc.
Supplies for choice board
Velcro
Laminate
Camera
Label Machine
Supplies for beads
Lots of beads
String for necklaces
Hooks
Subscribe to:
Posts (Atom)